
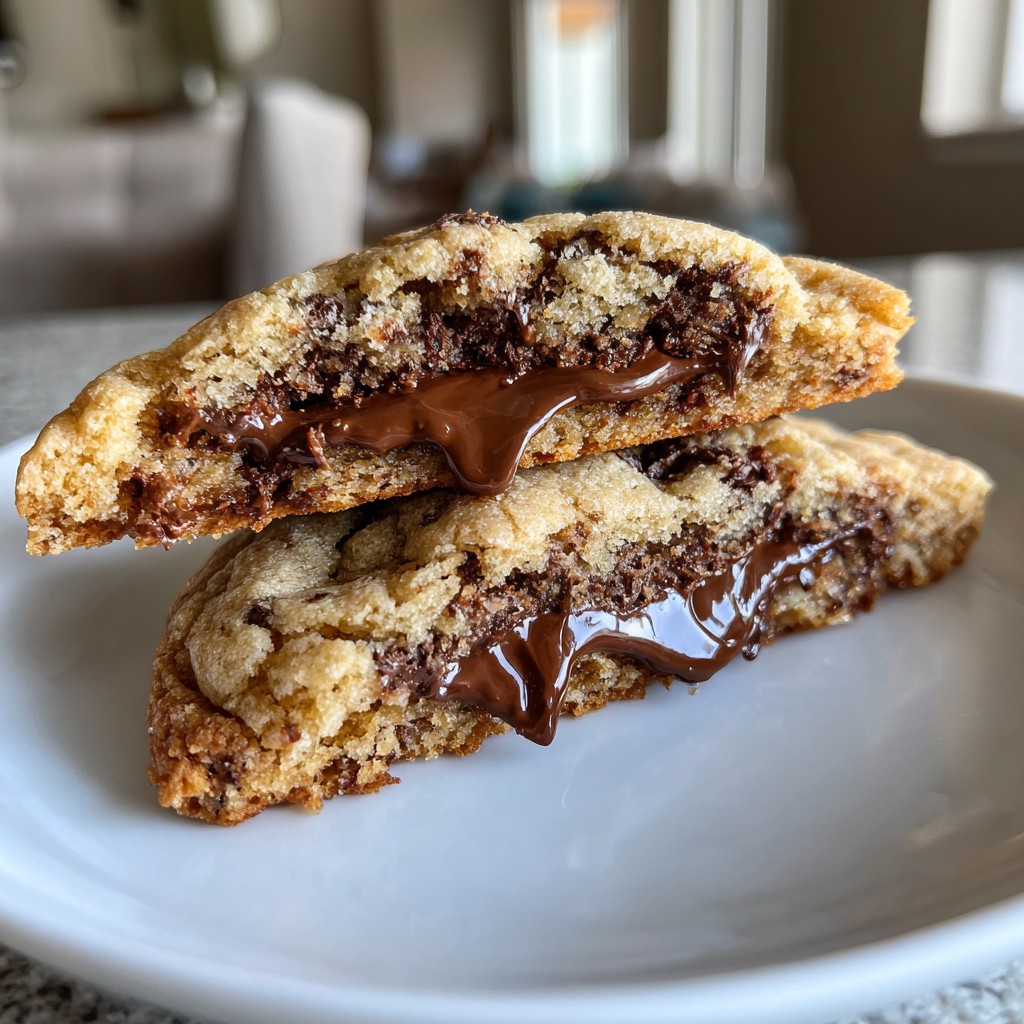
Let Me Tell You About Nutella Stuffed Cookies
Alright, so here’s the deal: the first time I tried to make Nutella stuffed cookies, I genuinely thought I could “eyeball” the filling and, well, let’s just say my oven is still recovering from the great Nutella flood of 2022. Still totally worth it! My sister claims I only bake these because I’m too impatient for brownies, but honestly, these cookies ended up a family favorite—usually disappearing before they’ve even cooled down. If you could smell my kitchen right now, you’d need to put the kettle on and sit a spell; there’s just something about warm cookies with gooey Nutella middles that draws everyone out of the woodwork (even my dog, Ralph, but he’s not allowed chocolate, so he just sits and judges).
I’m not gonna lie—sometimes I make a double batch just so there might be leftovers. Big might. Seriously, I brought a tin of these to my book club once and half the group started using words like “divine” and “dangerous.” Okay, stepping out of the kitchen for a sec: Have you ever noticed how food memories can be more vivid than movie scenes? Maybe it’s just me, but these cookies are burned into my sense of home—just thinking about them makes me hungry. Anyway, back to it!
Why I Keep Making These (And You Might Too)
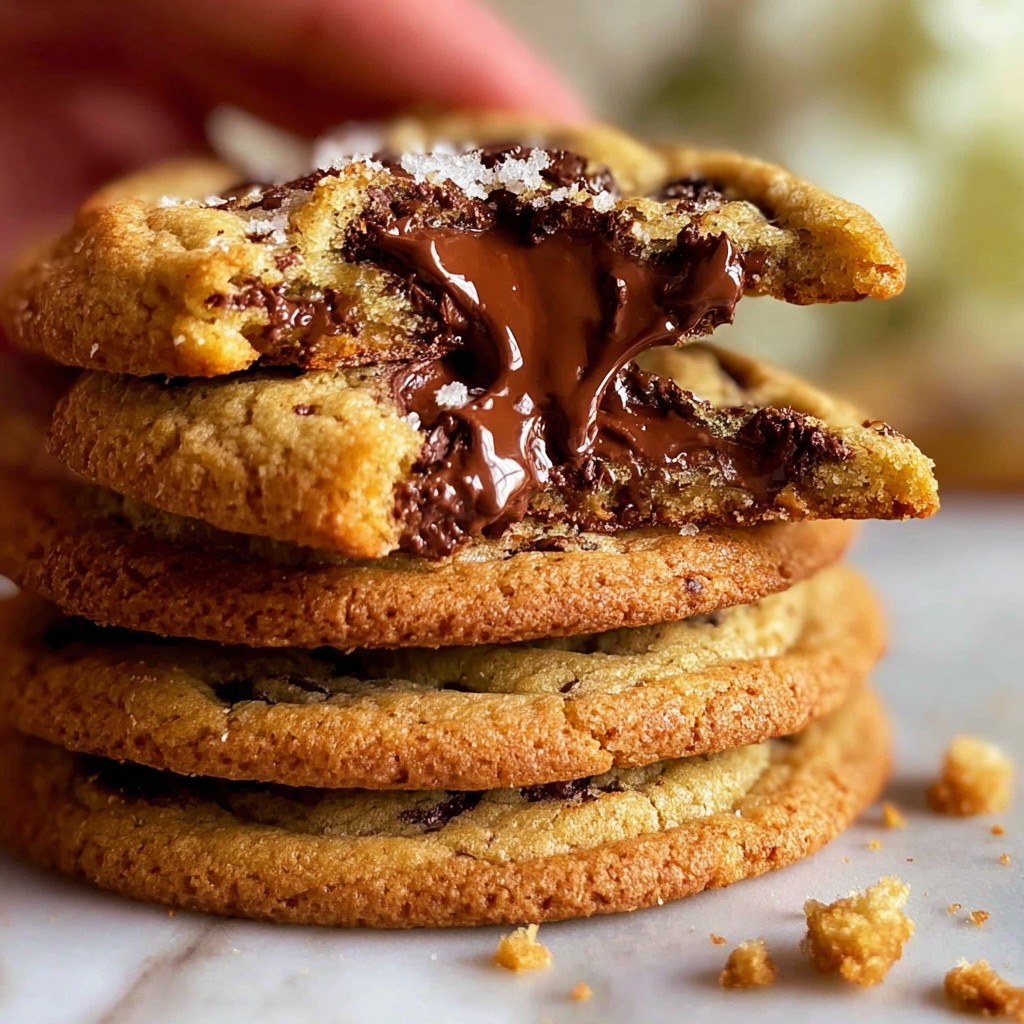
I make this recipe whenever I need something that’ll make everyone say “holy moly” with their mouths full. My family goes bonkers for the warm, Nutella-y centers. Sometimes if I’ve had a rough day (or honestly just a boring one), baking a batch gives me an energy boost that coffee can’t touch. And also, when the weather is all grey and dreary, it just feels right.
One tricky part (fair warning): getting Nutella to stay in the middle. Back in the day my cookies were all lopsided with Nutella peeking out like it’s trying to escape—which, okay, still tasted awesome, but was definitely not what I had in my head. I fix that now with a tiny freezer hack. We’ll get to that.
These Are The Ingredients (And Some Swaps I Like)
- 1/2 cup (115g) unsalted butter, softened (I’ve used salted in a pinch—just skip the extra salt if you do)
- 1/2 cup (100g) brown sugar – light or dark, really; my grandmother always insisted on Tate & Lyle but I’m not that picky
- 1/4 cup (50g) white sugar
- 1 large egg
- 1 tsp vanilla extract – real is great, but nobody’s judging the cheap stuff
- 1 3/4 cups (220g) all-purpose flour
- 1/2 tsp baking soda
- 1/2 tsp salt
- 3/4 cup semi-sweet chocolate chips – dark or milk are both fine, I once threw in white choc and it was… odd but edible
- 12 heaping tsp Nutella (or any store-brand, but, you know… real Nutella is magic)
How I Make Nutella Stuffed Cookies (and How You Can Too)
- Prep the Nutella centers first thing: Drop 12 heaping teaspoons of Nutella on a baking sheet lined with parchment; just eyeball it, no one’s counting. Chuck the tray in the freezer for 20 minutes or so. (Trust me, warm Nutella does not want to stay where you put it.)
- Cream the butter and sugars together in a bowl until they look thick and glossy—usually 3 minutes if you use a mixer. Elbow grease works too, but you’ll get a workout.
- Crack in your egg and vanilla, beat until everything’s smooth.
- Add flour, baking soda, and salt. Mix gently—I once made these with too much gusto and had flour clouds hanging around for days. Just go slow.
- Stir in your chocolate chips, but honestly, feel free to taste a handful at this stage (that’s usually what I do while no one’s looking).
- Scoop out a big tablespoon of dough, flatten it a bit in your palm, and pop one Nutella blob on top. Carefully fold the dough up and around it and seal it in—like an edible hug. If it looks a little gnarly, that’s normal for me too.
- Place each ball onto a lined baking tray (leave them some space, they spread out). I get about 12 cookies.
- Pop the tray back in the fridge for at least 10 minutes. Actually, I find it works better if I give them a little extra chill—keeps them from baking into one big super-cookie (unless that’s your goal?).
- Bake at 350°F (180°C), middle rack, 12-14 minutes. They’re done when golden on the edges but still soft-ish in the middle—don’t be tricked into overbaking! (This is where I usually squeal a little at how good the kitchen smells.)
- Let cool for 10 minutes, if you can wait. I usually can’t.
Random Notes From My Trials And Cookie Errors
- If you overbake them, the Nutella gets kinda stodgy—still tasty, just not as lava-like.
- Sometimes my cookies come out a funny shape but nobody cares once they bite them. Perfection is overrated anyway.
- I tried to skip the fridge step once; ended up with a weird cookie puddle. Lesson learned.

What Else I’ve Tried—And Some Flops
- Used Biscoff spread instead of Nutella—actually worked and the flavor is next-level rich.
- Peanut butter? Not my cup of tea here, a bit too thick, but if that’s your jam (pun intended), go for it.
- Threw in dried cherries one time and I think I was the only one who liked it. Live and learn.
Stuff You’ll Need (and Workarounds If You Don’t)
- Big mixing bowl (or, honestly, a soup pot if your bowls are in the dishwasher—been there).
- Electric mixer is nice, but a good old spoon works with some determination (plus you burn more calories, so technically they’re diet cookies—wink).
- Baking tray and parchment paper: if you’re out of parchment, grease up the tray well and cross your fingers, it works well enough.
- An ice cream scoop is fancy, but two spoons totally get the job done.
Storing These Is a Joke, But Here’s How Anyway
If I ever do have leftovers, they keep in a tin or airtight jar for 3 days, maybe 4 if you hide them behind something in the cupboard. You can freeze them for a month, I suppose, if you have more willpower than me. Once, I hid a batch in the vegetable drawer—no one thought to look there; they lasted almost two days! More typically, they’re gone by breakfast the next day (yes, my family eats cookies for breakfast sometimes; don’t judge).
How I Serve Them (And Occasionally Go Overboard)
Best straight out of the oven (after a few minutes, unless you like burnt tongues). Sometimes my nephew dunks his in milk and makes this face like he’s discovered fire. For adult moments, serve with coffee or even next to a scoop of vanilla ice cream for a late-night treat. At holidays, I stack them into a tower and dust with powdered sugar—makes me feel fancier than I actually am.
Lessons I’ve Learned – AKA: Don’t Rush Like I Did
- I once tried using melted butter instead of softened; everything flattened into disks. Tasty, but more like pancakes than cookies.
- Never skip chilling the dough after stuffing—unless you want a Nutella slip ‘n slide.
- Don’t go wild with fillings (learned the hard way with a marshmallow attempt, what a sticky mess).
FAQ: These Questions Come Up Every Time
- Can I make these ahead?
- Yep! Actually, I find it works better if you freeze the filled, unbaked dough balls—then just bake from frozen, adding a minute or two (see this tip I use all the time).
- Is there a store-brand hazelnut spread that works?
- Totally! The texture might be slightly runnier, so freeze it a little longer. (Sorry, Nutella purists.)
- Why are my cookies so flat?
- Usually this means your butter was too soft or melted. Or maybe you skipped the fridge step—been there too. Also, honestly check your baking soda isn’t ancient, I learned the hard way after a batch baked up dense and sad.
- Can I make these gluten-free?
- I’ve done it with a good 1:1 gluten-free flour (like Bob’s Red Mill), but maybe add an extra spoonful if the dough seems sticky. Results vary a bit, check out this guide from King Arthur Baking for more help.
- How do I keep the Nutella gooey?
- Trick is not to overbake and don’t skip the freezer bit early on. Also, don’t skimp on that Nutella dollop!
- Can I double this Nutella stuffed cookies recipe?
- I do all the time! Just make sure your mixer is big enough or do it in two rounds. Otherwise, flour showers for days (ask me how I know…)
So, if you need more details or troubleshooting, I quite like the in-depth guides at Broma Bakery—they go into way more nitty gritty than I usually bother with, and sometimes I pick up a new trick.
Let me know if you try these! And hey, if you manage to make them last a full day, you might have more self-restraint than I’ll ever have. Happy (messy) baking!
Ingredients
- 1 1/2 cups all-purpose flour
- 1/2 teaspoon baking soda
- 1/4 teaspoon salt
- 1/2 cup unsalted butter, softened
- 1/2 cup granulated sugar
- 1/4 cup packed brown sugar
- 1 large egg
- 1 teaspoon pure vanilla extract
- 1/2 cup Nutella (chilled and portioned into 12 spoonfuls)
- 1/2 cup semisweet chocolate chips (optional)
Instructions
-
1Preheat the oven to 350°F (175°C) and line a baking sheet with parchment paper. Chill 12 small dollops of Nutella in the freezer or fridge until firm.
-
2In a medium bowl, whisk together the flour, baking soda, and salt. Set aside.
-
3In a large bowl, beat the butter, granulated sugar, and brown sugar until light and creamy. Add the egg and vanilla extract and beat until combined.
-
4Gradually mix the dry ingredients into the wet ingredients. Fold in chocolate chips if using. Scoop about 1 1/2 tablespoons of dough and flatten in your hand.
-
5Place a chilled Nutella dollop in the center of each dough round, wrap the dough around the Nutella, and seal completely. Place seam side down on the baking sheet.
-
6Bake for 10-12 minutes or until edges are lightly golden. Allow cookies to cool on the baking sheet for 5 minutes before transferring to a wire rack to cool completely.
Approximate Information for One Serving
Nutrition Disclaimers
Number of total servings shown is approximate. Actual number of servings will depend on your preferred portion sizes.
Nutritional values shown are general guidelines and reflect information for 1 serving using the ingredients listed, not including any optional ingredients. Actual macros may vary slightly depending on specific brands and types of ingredients used.
To determine the weight of one serving, prepare the recipe as instructed. Weigh the finished recipe, then divide the weight of the finished recipe (not including the weight of the container the food is in) by the desired number of servings. Result will be the weight of one serving.
Did you make this recipe?
Please consider Pinning it!!
Leave a Comment